

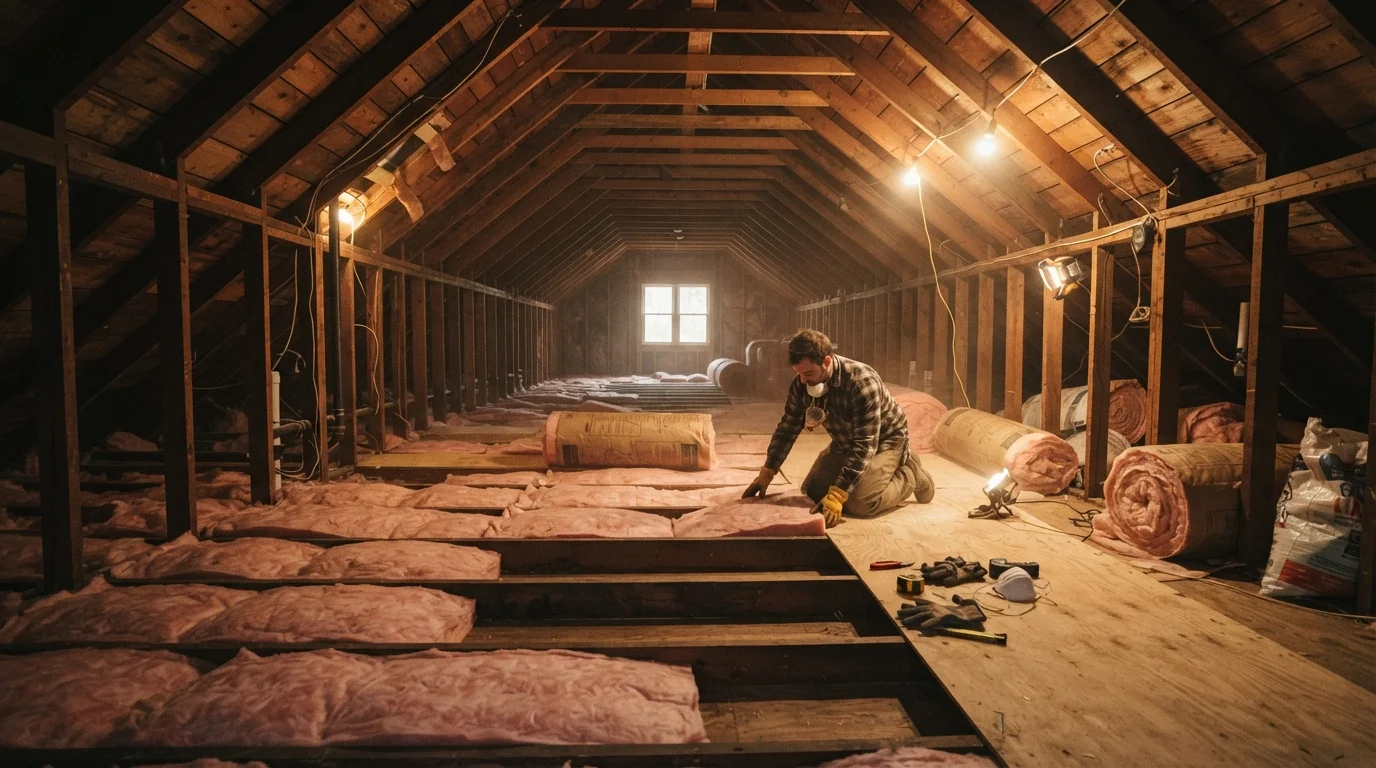
Why Attic Insulation Deserves More Attention Than It Gets
The attic is one of the largest sources of heat loss in a typical home. In winter, warm air rises and escapes through an under-insulated attic floor; in summer, intense radiant heat from the roof drives temperatures into the living space below. Either way, your heating and cooling system compensates by running longer-and your energy bills reflect it.
What makes attic insulation particularly impactful is that it is one of the more accessible home improvement projects a motivated homeowner can tackle. Unlike wall insulation, which requires opening finished surfaces, attic floors are typically exposed and reachable. That said, a successful outcome depends on doing the steps in the right order and understanding where the limits of DIY work lie. For a broader project planning perspective, the renovation planning checklist is a useful starting point before any significant home upgrade.
What you will need
Tools and Materials You'll Need
Gathering the right equipment before you enter the attic saves trips and reduces the time you spend in an uncomfortable environment. The tools below cover both batt and blown-in installation approaches.
Tape measure
Measure attic square footage and joist depth to calculate material quantities.
Utility knife
Cut batt insulation cleanly to fit around obstructions and into irregular spaces.
Caulk gun and fire-rated caulk
Seal gaps around penetrations and framing before insulation is installed.
Rigid foam board or baffles
Maintain ventilation channels at the eaves so airflow is not blocked by insulation.
Insulation blower (rental)
Distribute loose-fill cellulose or fiberglass evenly across the attic floor.
Plywood walkboards
Provide a safe surface to kneel and move on without stepping through the ceiling below.
Attic Work Carries Real Physical Risks
Attics are hot, dusty, and structurally unforgiving-stepping between joists rather than on them can send you through the ceiling below. Always lay walkboards across joists before moving around. Work during cooler parts of the day when possible, take breaks, and have a second person nearby when using a blower machine. Do not work alone if the access is difficult or the attic is extremely confined.
Step-by-Step: How the Installation Process Works
Follow these steps in order. Skipping ahead-particularly past the air sealing phase-is the most common reason attic insulation projects underperform expectations.
Assess your current insulation and attic conditions
Before purchasing any material, inspect the attic thoroughly. Measure the depth of any existing insulation and identify its type-fiberglass batts appear as pink or yellow mats, cellulose looks like grey shredded paper, and vermiculite (an older material sometimes containing asbestos) appears as small pebble-like granules. If you suspect vermiculite, do not disturb it-have a certified inspector test it before proceeding.
Also check for moisture stains, mold, pest activity, or damaged rafters. These issues must be resolved before any insulation work begins. Note the location of recessed lights, junction boxes, and HVAC equipment-these require special attention during air sealing.
Determine your target R-value
R-value measures a material's resistance to heat flow-the higher the number, the better the thermal performance. The U.S. Department of Energy divides the country into climate zones, each with a recommended total R-value for attics. Most of the continental U.S. falls in zones requiring R-38 to R-60 for attic floors. Subtract the R-value of your existing insulation from the target to find how much you need to add.
For a quick reference: roughly 3.5 inches of fiberglass batt equals R-13, while about 3.5 inches of blown cellulose equals R-13 as well. Both can be layered to reach higher targets. See our comparison of fiberglass and spray foam for a deeper look at how different materials perform.
Air seal all gaps and penetrations
This step is the most commonly skipped-and the most consequential. Warm conditioned air escapes through gaps around recessed light fixtures, plumbing stacks, top plates of interior walls, and any wiring penetrations. Once insulation covers these gaps, they become nearly impossible to seal effectively. Use fire-rated caulk or acoustical sealant for small gaps (under ¼ inch) and fire-rated expanding foam for larger ones. Cap any recessed lights not rated for insulation contact (IC-rated) with an airtight cover box before insulating over them.
Install ventilation baffles at the eaves
Ventilation baffles-also called rafter vents or chute vents-are rigid channels stapled between rafters at each rafter bay near the eaves. They create a clear airflow path from soffit vents up and out through ridge or gable vents, which prevents moisture buildup and ice dams. Without baffles, blown-in insulation can block soffit vents entirely, trapping humidity that eventually damages the roof structure. Install one baffle per rafter bay before adding any new insulation.
Install or blow in your chosen insulation material
For batt insulation, cut sections to fit snugly between joists without compression-compressed batts lose R-value. Lay a second layer perpendicular to the first to cover the joists themselves, which are thermal bridges (spots where heat easily passes). For blown cellulose or fiberglass, rent a blower machine (many insulation retailers offer this with material purchase), set up the hose, and work from the far end of the attic toward the access hatch. Depth guides-small rulers stapled to joists-help you achieve uniform depth. Keep the blower hose moving continuously to avoid thick clumps.
Restore access and document your work
After installation, insulate the attic hatch door or pull-down stair with a rigid foam cover or pre-made insulated cover box-this is a significant heat loss point that is often overlooked. Photograph the finished depth at multiple points for your records. Note the R-value achieved and the date, which is useful for home sale disclosures, insurance documentation, and future planning. If you used a contractor, request a written certificate of completion specifying the material, depth, and R-value installed.
Test for Drafts Before You Close Up
After air sealing but before laying insulation, use a stick of incense or a smoke pencil near suspected gaps on a windy day. Moving smoke reveals airflow you might otherwise miss. This simple check can identify leaks that undermine even a thick layer of new insulation and costs nothing extra.
When to Call a Licensed Professional
Several scenarios move attic insulation out of DIY territory. Spray foam insulation-either open-cell or closed-cell-involves chemical mixing that requires specialized equipment and training, and improper application can cause air quality problems or structural issues. Any work near knob-and-tube wiring (an older wiring system common in homes built before the 1950s, identifiable by individual ceramic insulators strung along joists) should be evaluated by a licensed electrician before insulation is added, as covering live knob-and-tube wiring with insulation can create a fire hazard.
Structural repairs, mold remediation, and asbestos abatement all require licensed specialists. If your project involves any of these elements, get professional assessments first-and verify credentials before hiring. Our guide on vetting a contractor walks through what to look for before signing any agreement.
Finally, be aware of common misconceptions that can lead to wasted spending or poor results. For example, simply adding more insulation on top of a moisture or ventilation problem will not fix the underlying issue-it often makes it worse. The article on persistent insulation myths covers several of these pitfalls in detail.
This article is for general informational and educational purposes. Local building codes, permit requirements, and safety regulations vary. Consult qualified contractors and your local building authority before undertaking significant insulation work, especially where electrical, structural, or hazardous material concerns are present.
The content provided on our blog site traverses numerous categories, offering readers valuable and practical information. Readers can use the editorial team’s research and data to gain more insights into their topics of interest. However, they are requested not to treat the articles as conclusive. The website team cannot be held responsible for differences in data or inaccuracies found across other platforms. Please also note that the site might also miss out on various schemes and offers available that the readers may find more beneficial than the ones we cover.