

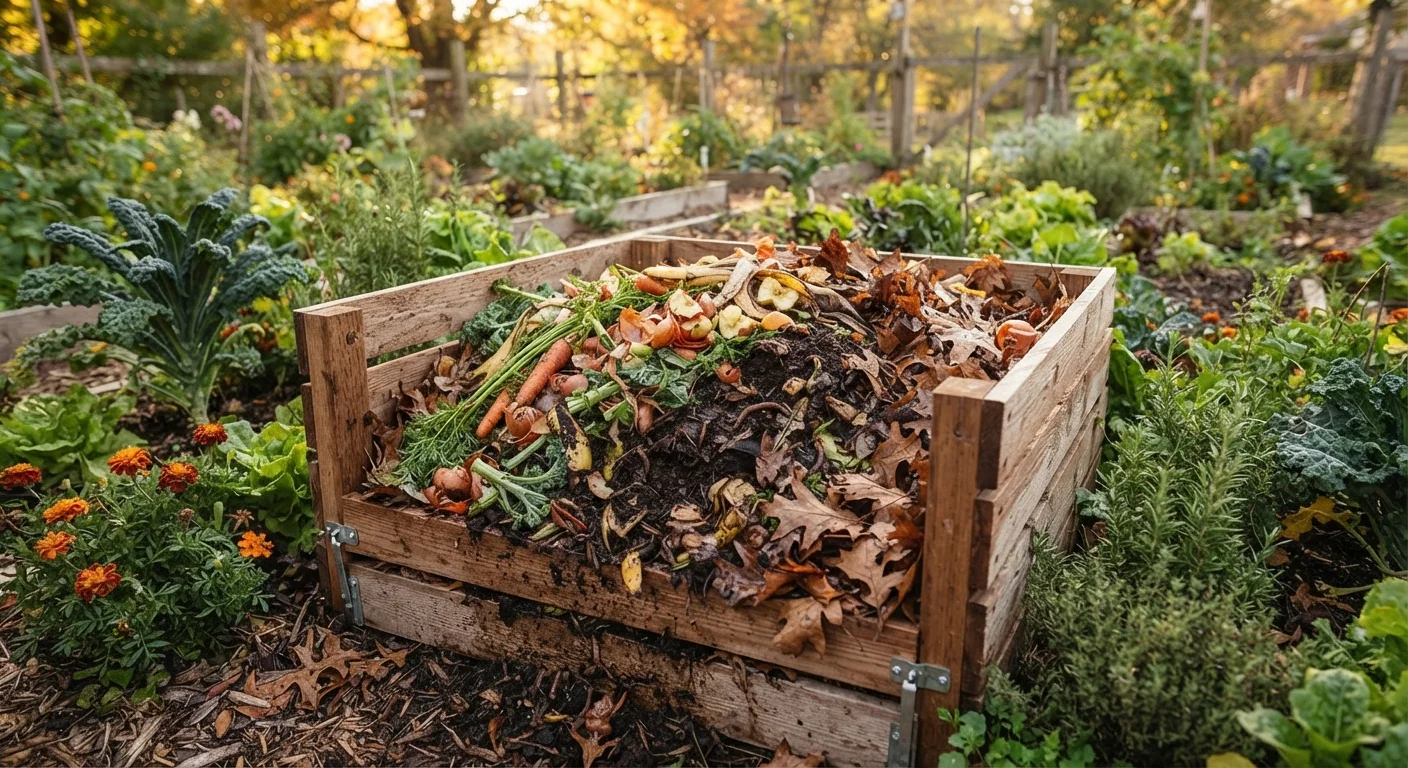
Why Home Composting Saves Money and Builds Better Soil
The average US household throws away a substantial amount of organic material every week - vegetable trimmings, fruit peels, coffee grounds, eggshells. That material, sent to landfill, generates methane as it breaks down in an anaerobic (oxygen-free) environment. In your backyard, the same material becomes a free, slow-release soil amendment that improves garden productivity over time.
Commercially produced compost and bagged soil conditioners can cost $10-$25 per bag. A home system, once established, produces a continuous supply at virtually no ongoing cost. If you're working toward a productive food garden - especially if you've read our guide to starting a vegetable garden - homemade compost gives you a meaningful head start on soil quality without adding to your budget.
Compost improves soil on multiple levels: it adds organic matter that improves drainage in clay soils and moisture retention in sandy soils, feeds the microbial life that makes nutrients available to plant roots, and gradually raises the biological complexity of your growing beds. For a deeper look at why this matters long-term, see our article on feeding your soil, not just your plants.
Compost bin or container
Holds organic material in one place, retains heat, and keeps pests out.
Garden fork or compost turning tool
Used to aerate the pile by turning it every 1-2 weeks.
Kitchen scrap pail with lid
Collects food scraps on the countertop between trips to the outdoor bin.
Garden hose or watering can
Used to add moisture when the pile becomes too dry.
Compost thermometer
Monitors internal pile temperature to confirm active decomposition is occurring.
What to Compost and What to Avoid
The key to a problem-free pile is understanding which materials belong and which don't. Composting works through microbial decomposition - bacteria, fungi, and invertebrates break down organic matter when given the right conditions. The materials you add determine whether that process runs cleanly or creates problems.
Good 'Greens' (Nitrogen-Rich)
- Raw fruit and vegetable scraps
- Coffee grounds and unbleached paper filters
- Loose-leaf tea and tea bags (remove staples)
- Fresh grass clippings (in thin layers)
- Crushed eggshells
- Plant prunings and fresh garden trimmings
Good 'Browns' (Carbon-Rich)
- Dry autumn leaves
- Shredded plain cardboard and newspaper
- Straw or dry hay
- Paper bags and paper towels
- Untreated wood chips or sawdust
Never Compost These Materials
Meat, fish, dairy, cooked foods with oils, and pet waste should never go into a home compost pile. These materials attract pests, create strong odors, and can introduce pathogens. Stick to raw plant-based kitchen scraps and dry garden material for a safe, manageable system.
Diseased plants are a gray area - most home compost piles don't reach temperatures high enough to kill all plant pathogens. When in doubt, keep diseased plant material out of the pile. For more guidance on what works in the garden versus what's folk wisdom, our article on common garden myths is worth a read.
Troubleshooting Common Compost Problems
Most compost problems have simple fixes once you know what's causing them.
Problem: The pile smells bad
A sulfur or ammonia odor usually signals too many greens, too much moisture, or insufficient aeration. Turn the pile, add a generous layer of dry browns, and mix thoroughly. Avoid adding more food scraps until the smell resolves.
Problem: Nothing seems to be breaking down
A cold, inactive pile is usually too dry, too carbon-heavy, or too small to generate heat. Add a nitrogen source (fresh grass clippings or vegetable scraps), water lightly, and turn to aerate. A pile smaller than 3 cubic feet will struggle to heat up in cool weather.
Problem: Pests are getting in
If rodents or raccoons are attracted to the bin, avoid adding cooked foods, oils, or grains, which you shouldn't include anyway. A secure lid and hardware cloth lining on the base of a DIY bin will deter most wildlife.
Speed Up Decomposition Naturally
Chop or shred materials before adding them to the pile. Smaller pieces expose more surface area to microbes, which noticeably accelerates breakdown. Coffee grounds, already finely ground, are among the fastest-decomposing kitchen additions you can add.
Siting Matters More Than You Think
Place your compost bin at least 10 feet from your home's foundation and away from wooden fencing or structures. Decomposing organic matter retains heat and moisture that can damage wood over time. Check local ordinances - some municipalities have rules about compost placement or bin types.
Once your composting system is established and productive, the finished material pairs naturally with organic mulch strategies to create a low-cost, self-sustaining garden maintenance routine. Even families gardening in limited spaces can benefit - see our guide to growing food in small spaces for how compost fits into container and vertical growing setups.
What you will need
Choose and set up your compost bin
Select a spot with partial shade and good drainage. A simple wire cage, a wood pallet bin, or a store-bought tumbler all work - the container style matters less than consistency. Set it directly on soil or grass so earthworms and beneficial organisms can migrate up into the pile. Avoid concrete or decking as a base.
Start with a base layer of browns
Before adding any food scraps, lay down a 4-6 inch base of dry carbon-rich material - often called 'browns.' Suitable browns include dry leaves, shredded cardboard, straw, or untreated wood chips. This layer creates airflow at the base and immediately absorbs moisture from the food scraps you'll add on top.
Add kitchen scraps in the 'greens' layer
Greens are nitrogen-rich materials that fuel microbial activity. Good kitchen greens include raw fruit and vegetable scraps, coffee grounds and paper filters, loose-leaf tea, and crushed eggshells. Add these in roughly 2-3 inch layers. Eggshells decompose slowly but add calcium - crush them first to speed the process.
Maintain the right carbon-to-nitrogen ratio
A healthy compost pile needs roughly 3 parts browns to 1 part greens by volume. Too many greens without enough browns leads to a wet, smelly pile. Too many browns without greens produces a dry pile that barely decomposes. Each time you add a layer of kitchen scraps, cover it with a roughly equal or larger layer of dry browns to maintain balance.
Manage moisture and aeration
Your pile should feel like a wrung-out sponge - damp but not dripping. If it looks dry and powdery, add water and mix. If it smells like ammonia or rotten eggs, it's likely too wet or compacted. Turn the pile with a garden fork every 1-2 weeks to introduce oxygen, which the beneficial microbes breaking down your materials require to thrive.
Harvest and apply finished compost
Finished compost looks and smells like dark, crumbly soil - earthy, not rotten. Depending on conditions, this can take anywhere from 2 months (active, warm conditions with regular turning) to 6-12 months (passive piles with less maintenance). Scoop finished compost from the bottom of the pile. Apply 1-2 inches to garden beds and work it gently into the top few inches of soil.
The content provided on our blog site traverses numerous categories, offering readers valuable and practical information. Readers can use the editorial team’s research and data to gain more insights into their topics of interest. However, they are requested not to treat the articles as conclusive. The website team cannot be held responsible for differences in data or inaccuracies found across other platforms. Please also note that the site might also miss out on various schemes and offers available that the readers may find more beneficial than the ones we cover.